
TAPE CUTTERS · BLADE
The pieces come out still joined by a few threads, or one edge cuts and the other doesn't. Often the blade has worked loose or lost even contact, and resetting it takes a hex key and a few minutes.
The machine runs, the counter climbs, and the pieces drop into the box. Then someone picks them up and finds they are still hanging together by a few threads. Someone ends up pulling them apart or trimming them with scissors.
When a tape cutter stops cutting through, the blade often still has a usable edge. It is just no longer meeting the strip firmly and evenly across its width. This guide follows the reset shown in the video: how to get to the blade safely, seat it flat, test it by hand, and lock it in place.
THE SHORT ANSWER
Switch the machine off. Use a hex key in the knife holder to bring the blade down. Loosen the two large screws, press the blade flat with both hands, and snug the large screws just enough to stop it moving. Snug the two small screws. Turn the holder by hand and test-cut a strip at both edges. If it doesn't cut through, tighten the small screws a little more and test again. When it cuts, tighten the two large screws and run the machine.
- 01 Why it stops cutting
- 02 Get to the blade
- 03 Seat the blade
- 04 Test by hand
- 05 Lock and run
- 06 Other causes
- → HESPER machines
- ? FAQ
01 · WHY IT STOPS CUTTING
Why the strip is left joined
A tape cutter cuts when the moving blade meets the strip firmly along the whole cutting line. If the blade has shifted or loosened in its holder, it can still press into the strip without parting every fiber. The result is a piece that looks cut but hangs on by a few threads.
If the contact is uneven from one end of the blade to the other, one edge of the strip cuts and the other doesn't. That is why the video tests the cut at both sides.
| What you see | Likely cause | What to change |
|---|---|---|
| Pieces joined by threads across the width | Blade not meeting the strip firmly | Reseat the blade and tighten the small screws a little |
| One edge cut, the other still joined | Uneven contact along the blade | Test each edge by hand and adjust the small screw on the side that doesn't cut first |
| Blade moves when pressed by hand | Large clamping screws loose | Press the blade flat and retighten the large screws |
| Cut was fine until a new material went on | Thicker or tougher strip | Repeat the hand test with that material |
| Clean after a reset, but threads come back quickly | Worn or damaged edge | Inspect the blade. It may need sharpening or replacing |
02 · GET TO THE BLADE
Switch off and bring the blade down
- Power off. Switch the machine off before you put a tool anywhere near the cutter.
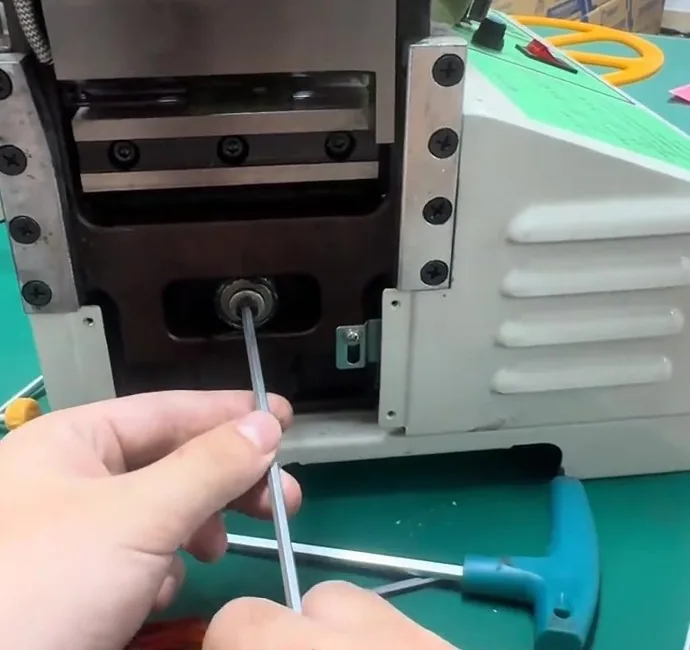
- Find the knife holder. Some makers call it the blade holder. On the machine in the video, a hex socket in the knife holder sits below the blade, at the front.
- Bring the blade down. Turn the holder with a hex key until the blade comes down and the screws above it are easy to reach.
03 · SEAT THE BLADE
Press it flat, then snug the screws
The blade is held by two large screws and set by two small ones. The order matters.
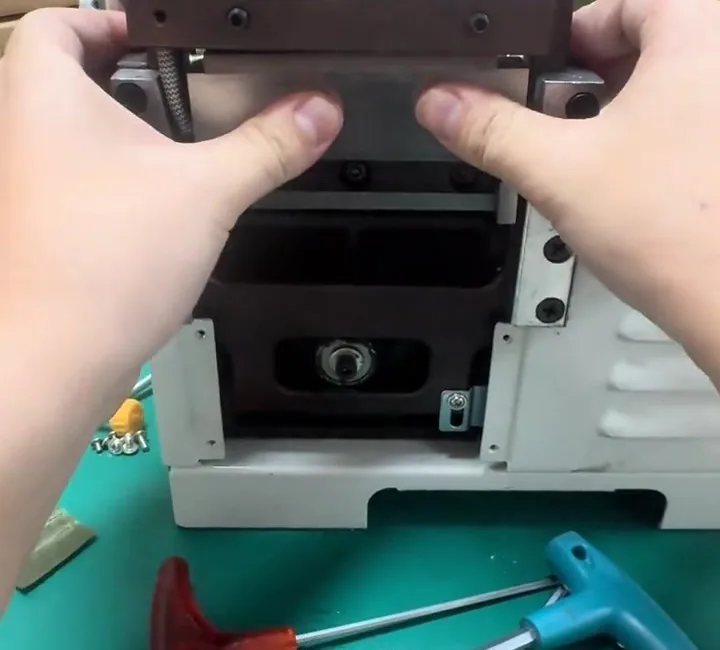
- Loosen the two large screws. Just enough for the blade to move.
- Press the blade flat with both hands. Push it firmly against its seat so it sits evenly along its length.
- Snug the large screws lightly. Hold the blade in place and tighten them only until it no longer moves. Don't lock them down yet.
- Snug the two small screws. Tighten them slightly as well.
04 · TEST BY HAND
Turn the holder and cut a strip
Don't start the machine to find out whether the reset worked. Test it slowly by hand.
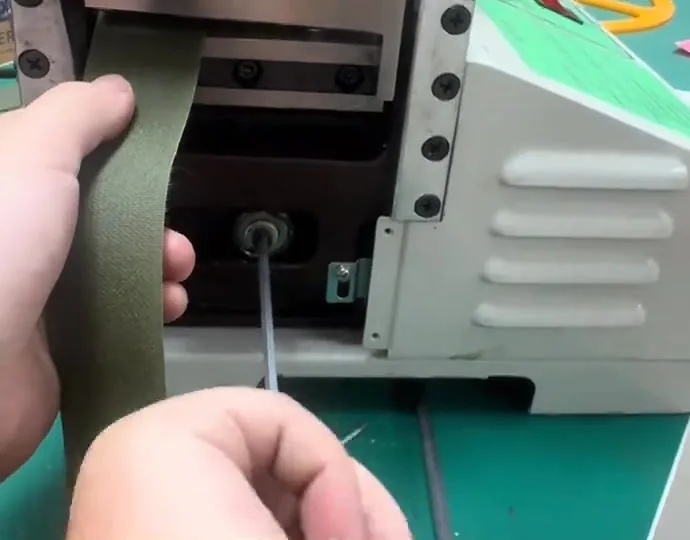
- Raise the blade. Turn the knife holder back with the hex key.
- Put a strip in place. Use the material you actually cut.
- Turn the holder by hand. Bring the blade through the strip and see whether it parts cleanly.
- Try both edges. Test near each side of the strip.
- Still joined? Tighten the small screws a little more and test again. In the video neither side cut through at first, so both small screws were tightened a little and the test repeated.
05 · LOCK AND RUN
Fix the large screws and run the machine
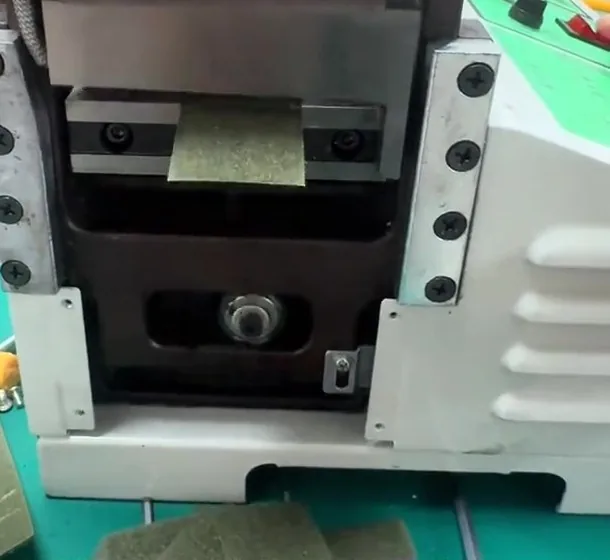
When the strip cuts cleanly at both edges, tighten the two large screws firmly to fix the blade. The small screws stay where they are. Then switch the machine on and run it. In the video, the webbing and then a length of hook and loop tape both cut through, and the pieces drop away cleanly.
06 · OTHER CAUSES
When a reset isn't enough
- A worn or chipped edge. If threads return soon after each reset, look closely at the blade edge.
- A different material. Thick, dense webbing or tougher tape can need a firmer setting than the last job. Repeat the hand test whenever the material changes.
- Hot cutting. If you use the hot knife, a temperature that is too low for the material can also leave ends joined. Check the temperature setting as well as the blade.
HESPER EQUIPMENT
HESPER hot and cold tape cutting machines
Four options, each listed with hot and cold knife cutting. Details and specifications are on the tape cutter page.
95 MM
95mm EconomyCutting width 1–95 mm. Button control panel for routine cut-to-length work.95 MM
95mm High-SpeedCutting width 1–95 mm. LCD and buttons.210 MM
210mm TouchscreenCutting width 1–210 mm for wider tapes and webbing.310 MM
310mm TouchscreenCutting width 1–310 mm for the widest strips.? FAQ
Tape cutter blade questions
Why is my tape cutter not cutting through?
Often because the blade has worked loose or no longer meets the strip evenly. The strip is pressed but not fully parted, so pieces hang on by a few threads. Reseating the blade and adjusting its small screws often fixes it.
Why does only one side of the strip cut?
The blade is making firmer contact at one end than the other. Test each edge by hand and adjust the small screw on the side that doesn't cut first.
Should I lock the large screws straight away?
No. Snug them just enough to stop the blade moving, set the small screws and test the cut. Lock the large screws only once the strip cuts cleanly.
Can I test the blade with the machine running?
Test it by hand first, with the power off, by turning the knife holder with a hex key. It is slower but safer, and you can see exactly where the strip is left joined.
How tight should the small screws be?
Only as tight as it takes to cut cleanly at both edges. Add a little at a time and test after each change.
Does this work for webbing and hook and loop tape?
In the video, the same reset cut both webbing and hook and loop tape. Test with the material you actually run, because thicker or tougher strips can need a firmer setting.
When should the blade be replaced?
If the cut stays poor after a careful reset, or the threads come back soon after each one, inspect the edge. A worn or chipped blade may need sharpening or replacing.
BLADE
Still Leaving Threads?
Send HESPER a short video of a cut, along with the material, its width and thickness, and whether you use the hot or cold knife. Seeing where the strip stays joined is often the quickest way to find the cause.
Send your cutting video · See the tape cutters · sales@hespermachine.com